Ads inside ChatGPT are live, and the measurement layer is where nearly all of the real implementation work sits.
OpenAI’s developer documentation for the Ads platform is accurate, but it’s scattered. The pixel, the image tag, the Conversions API, event schemas, product feeds, and campaign types each live on their own page with no narrative connecting them. This guide is that narrative, and it covers two setups: a minimum viable install that gets attribution working today, and the synced pixel plus Conversions API setup you actually want running long-term.
Everything below comes from OpenAI’s official documentation. I’ve linked the source docs throughout so you can verify any detail against the primary reference.
How OpenAI Ads Measurement Works
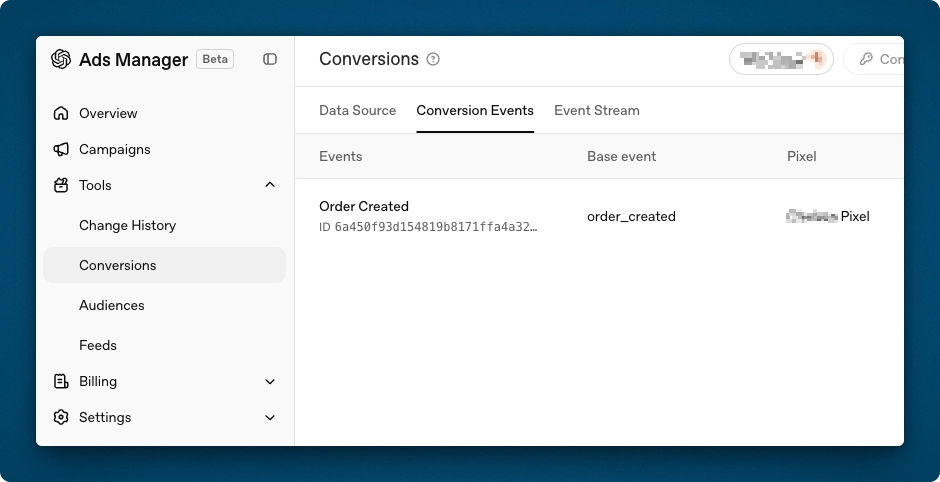
The architecture will feel familiar if you’ve implemented Meta’s Pixel with the Conversions API, or Google’s gtag alongside the Measurement Protocol. OpenAI gives you three ways to report conversions, and all three tie back to a single Pixel ID that you create in the conversions tab of Ads Manager.
The Three Reporting Channels
The JavaScript pixel (oaiq) is a browser SDK you install site-wide and fire events from the client. The image tag is a 1×1 <img> request for environments where JavaScript can’t run, limited to one event per request. The Conversions API is a server-to-server endpoint, and OpenAI explicitly describes it as a more reliable tracking source than the pixel alone.
Most implementations should use at least two of these. The pixel handles the automatic bookkeeping, the Conversions API handles the events that actually matter to your revenue, and the image tag exists as a fallback for the small percentage of sessions where JavaScript never executes.
Attribution and the oppref Parameter
Attribution flows through a privacy-preserving identifier called oppref. When someone clicks your ad inside ChatGPT, oppref arrives on your landing page URL as a query parameter. The JavaScript pixel captures it automatically and stores it in a first-party __oppref cookie so later page views can reuse the value.
The image tag and the Conversions API do not capture it for you. If you’re sending events from your server, reading and forwarding oppref is your responsibility, and skipping this step is the single most common reason a server-side setup silently reports unattributed conversions. Plan for it before you write a line of backend code.
The Minimum Viable Setup: Pixel Only
If you need conversion tracking live today, this is the whole job. Install the base snippet, then fire events at your conversion points. Two steps, and you’ll have attribution on ad clicks plus the tracking prerequisite for conversion-optimized campaigns.
Installing the Base Pixel
Add this to the <head> of every page where you want to capture conversions. OpenAI recommends placing it near the top of <head> so early conversions aren’t lost while the rest of the page loads.
<script>
  (function (w, d, s, u) {
    if (w.oaiq) return;
    var q = function () {
      q.q.push(arguments);
    };
    q.q = [];
    w.oaiq = q;
    var js = d.createElement(s);
    js.async = true;
    js.src = u;
    var f = d.getElementsByTagName(s)[0];
    f.parentNode.insertBefore(js, f);
  })(window, document, "script", "https://bzrcdn.openai.com/sdk/oaiq.min.js");

  oaiq("init", {
    pixelId: "<YOUR-PIXEL-ID>",
  });
</script>
pixelId is the only required config value. There’s an optional debug flag that logs SDK activity to the browser console, which is worth enabling while you’re testing and disabling before you ship.
On a WordPress site this belongs in your theme’s wp_head output or in your tag manager. If you’re deploying through Google Tag Manager, load it in a Custom HTML tag on All Pages, and make sure it fires as early as GTM will allow for the same reason OpenAI wants it high in the <head>.
What the Pixel Handles Automatically
Once the base snippet is in place, the SDK captures oppref from the landing page URL, stores it in the first-party __oppref cookie for later page views, attaches the current page origin as source_url, timestamps every event, and batches closely grouped measure calls.
None of that requires configuration. This is precisely why the pixel is the right starting point regardless of how sophisticated your final setup becomes, because it does the attribution bookkeeping that you’d otherwise have to build and maintain yourself.
Firing Conversion Events
Events use a single call signature with four arguments:
oaiq("measure", eventName, eventProps, eventOptions);
eventName must be one of the supported standard event names or the literal string custom. eventProps carries the event data and is technically optional, though the docs recommend sending it on every event so the type field is always explicit. eventOptions carries delivery options like event_id for deduplication and custom_event_name for custom events.
The event_id and custom_event_name values belong in eventOptions, the fourth argument, not in eventProps. The docs flag this with an explicit caution, and it’s the wiring mistake I’d expect most teams to make on their first implementation.
Here’s a completed purchase:
oaiq("measure", "order_created", {
  type: "contents",
  amount: 2599,
  currency: "USD",
  contents: [
    {
      id: "sku_123",
      name: "Starter bundle",
      content_type: "product",
      quantity: 1,
    },
  ],
});
Note that amount: 2599 is $25.99. All monetary values are integers in the currency’s lowest denomination, and any time you send an amount you must also send a currency as a three-letter ISO 4217 code. Quantities are integers as well. No floats, no strings.
A lead form submission is considerably simpler:
oaiq("measure", "lead_created", {
  type: "customer_action",
});
And a subscription signup sits in between:
oaiq("measure", "subscription_created", {
  type: "plan_enrollment",
  plan_id: "pro_monthly",
  amount: 2000,
  currency: "USD",
});
The Full Event Taxonomy
OpenAI supports eleven standard events, and each one maps to exactly one of four data shapes. Pair them incorrectly and the event is invalid, so this table is worth keeping open during implementation.
Standard Events and Their Data Types
| Event name | Data type | Use for |
|---|---|---|
page_viewed |
contents |
A user lands on or views an important page |
contents_viewed |
contents |
A user views a product, listing, article, or other content unit |
items_added |
contents |
A user adds items to a cart, bundle, or selection |
checkout_started |
contents |
A user starts checkout |
order_created |
contents |
A purchase is completed |
lead_created |
customer_action |
A user submits a lead form or requests contact |
registration_completed |
customer_action |
A user finishes an account or event registration flow |
appointment_scheduled |
customer_action |
A user books a meeting, demo, or consultation |
subscription_created |
plan_enrollment |
A paid subscription starts |
trial_started |
plan_enrollment |
A free trial starts |
custom |
custom |
Anything not covered by the standard taxonomy |
Two distinctions are worth internalizing. Use page_viewed for page loads and contents_viewed when a user views a specific product or content item, including interactions that happen after the page has loaded like a quick-view modal or a variant selection. The contents[] array accepts only the documented fields (id, name, content_type, quantity, amount, currency), all optional, and OpenAI rejects anything else you try to send.
Custom Events
Custom events keep eventName as custom, set eventProps.type to custom, and put the actual label in eventOptions.custom_event_name. Names must be 1–64 characters, contain only letters, numbers, underscores, or dashes, start and end with a letter or number, and can’t collide with a standard event name. Lowercase is the sane convention.
Custom events cannot be used as optimization goals for conversion-optimized campaigns, which is the reason to force-fit your conversions into the standard taxonomy wherever it’s reasonable to do so.
oaiq(
  "measure",
  "custom",
  {
    type: "custom",
    amount: 12999,
    currency: "USD",
    plan_id: "enterprise_annual",
  },
  {
    custom_event_name: "quote_requested",
    event_id: "quote_req_123",
  }
);
The Ideal Setup: Pixel + Conversions API, Synced
Browser-only tracking under-reports. Ad blockers, Safari’s ITP, and pages abandoned before the beacon fires all cost you conversions, and you already know this story from every other ad platform. OpenAI’s answer is the same as Meta’s: send the conversion from your server as well, and deduplicate against the browser event so it only counts once.
The Conversions API documentation states it directly, that it’s the more reliable source and OpenAI encourages using it whenever possible. The target architecture is three parts: the pixel on every page handling oppref capture and lightweight events, the Conversions API sending your high-value events from the backend where you have the order record and nothing can block the request, and both channels firing the same conversion with the same event ID.
Sending Server Events
You’ll need a Conversions API key, provisioned alongside your Pixel ID from the conversions tab in Ads Manager. Events POST to a single endpoint:
curl -X POST "https://bzr.openai.com/v1/events?pid=<PIXEL-ID>" \
  -H "Authorization: Bearer <API-KEY>" \
  -H "Content-Type: application/json" \
  --data '{
    "validate_only": false,
    "events": [
      {
        "id": "order_12345",
        "type": "order_created",
        "timestamp_ms": 1773892800000,
        "oppref": "oppref_abc",
        "source_url": "https://shop.example.com/checkout/confirmation",
        "action_source": "web",
        "data": {
          "type": "contents",
          "amount": 2599,
          "currency": "USD",
          "contents": [
            {
              "id": "sku_123",
              "name": "Starter bundle",
              "content_type": "product",
              "quantity": 1
            }
          ]
        }
      }
    ]
  }'
The id field is your unique event identifier and doubles as the deduplication key when paired with type. The timestamp_ms value must fall within the last 7 days and no more than 10 minutes into the future, which matters if you’re backfilling from a queue. source_url is required whenever action_source is web.
The action_source field accepts web, mobile_app, offline, physical_store, phone_call, email, or other. That offline option is the interesting one, because it opens the door to CRM-driven conversion uploads for closed-won deals, phone sales, and in-store purchases.
Batching allows up to 1,000 events per request, but it’s all-or-nothing. If one event in a batch fails, the entire batch fails, so build your retry logic accordingly and keep experimental payloads out of production batches. Use validate_only: true liberally during development to validate a payload without saving it.
Deduplication
If the same conversion arrives from both the pixel and the server without coordination, it counts twice. The contract is short: the pixel event’s event_id and the API event’s id must be identical, both events must use the same Pixel ID, and for custom events both sides must also use the same custom_event_name.
Deduplication matches on Pixel ID plus event name plus event ID. In practice your order ID is the natural choice for that shared value:
oaiq(
  "measure",
  "order_created",
  {
    type: "contents",
    amount: 2599,
    currency: "USD",
  },
  {
    event_id: "order_12345",
  }
);
Your server then sends the same order_created event with "id": "order_12345" through the Conversions API. One conversion, two delivery paths, counted once. If you omit event_id on a pixel call the SDK generates one automatically, which is fine for client-only delivery and useless the moment you add a server-side channel.
One firm rule from the docs: never call the Conversions API endpoint from browser code. The pixel is for the browser, the API is for your server, and your API key has no business appearing in page source.
A Practical WordPress and WooCommerce Flow
The documentation is platform-agnostic, so here’s how I’d wire this on a typical WooCommerce build, with each step mapped to what the docs require.
Start with the pixel snippet in the <head> site-wide, which captures oppref into the __oppref cookie on the ad-click landing page automatically. On the server, read that cookie during checkout and store the value in order meta, because this is the “capture the value yourself” requirement the Conversions API docs call out. On the order confirmation page, fire the pixel’s order_created with event_id set to the order ID.
From a server-side hook on order completion, POST the same event to the Conversions API using the same event ID, the same Pixel ID, the stored oppref, action_source: "web", and the confirmation page URL as source_url. Run with validate_only: true in staging until your payloads pass clean. The pattern generalizes to any lead-gen or SaaS stack: capture oppref early, persist it with the user or session, replay it server-side with a shared event ID.
The Image Tag Fallback
The image tag exists for exactly one scenario, which is sending a conversion when a page loads and JavaScript can’t run. It’s a hidden 1×1 image in the <body> with event data riding on query parameters, each prefixed with data[...].
All dynamic values must be URL-encoded, and if you send data[contents] you serialize the array as JSON and URL-encode the entire string.
Using It Inside noscript
The most useful deployment wraps the tag in <noscript> so it only loads when JavaScript is unavailable, which complements the pixel instead of double-firing alongside it.
<noscript>
  <img
    src="https://bzr.openai.com/v1/sdk/events?pid=<PIXEL-ID>&event=page_viewed&data[type]=contents"
    width="1"
    height="1"
    style="display:none"
    alt=""
  />
</noscript>
Don’t wrap it in <noscript> if the image tag is your only integration on a page, because it will never fire for normal visitors. It participates in deduplication the same way the pixel does, so if the same conversion also goes through the Conversions API, use the image tag’s event_id as the API event’s id.
Known Limitations
The image tag fires on page load only, so it can’t measure clicks, form submissions, or anything else that happens after load. It sends one event per request with no batching, and it’s subject to URL-length limits, so large contents arrays simply won’t fit.
There’s no user object available, and you should never put personal data, secrets, session IDs, customer identifiers, or order identifiers into query parameters. It also doesn’t capture oppref automatically, so pass it explicitly only when your rendering layer already has the value. You can smoke-test the endpoint with curl, where an accepted request returns a 200 with a content type of image/gif, confirming the event was published to the ingestion pipeline rather than fully processed downstream.
Product Feeds for Catalog-Driven Ads
If you’re running ecommerce, product feeds let you connect your merchant catalog to a campaign instead of building an ad per SKU. OpenAI selects an eligible product at serving time and renders it through a template you define once.
The Four Moving Parts
| Part | Purpose |
|---|---|
| Product feed | Supplies the current merchant catalog |
| Campaign | Sets budget, schedule, targeting, and product_feed mode |
| Product set | Selects one linked feed and optionally filters which products can serve |
| Product-ad template | Defines how the selected product’s values appear in the ad |
Each layer constrains the one below it, so a misconfiguration at the feed level quietly kills delivery no matter how well the ad group and template are built.
Setup and Reporting
Create the feed connection in the Feeds area of Ads Manager and upload your catalog to the SFTP location shown there. This part is not exposed in the public Advertiser API, where POST /upload handles static creative assets only and there are no public endpoints for creating feed connections or uploading catalogs.
Mark products as ads-eligible with is_ads_eligible: true, noting that the legacy is_eligible_ads alias is still accepted and that eligibility is necessary but doesn’t guarantee serving. Create a campaign with mode: "product_feed", which is locked at creation and can’t be changed later, then create an ad group with a product_set pointing at your product_feed_id. Filters support in, gt, gte, lt, and lte, values are always strings even when they’re numbers like "4.5", and you can’t repeat the same field within one product set.
Finally, create one product_ad_template creative using tokens like {{product.title}}, {{product.body}}, and {{product.price}}. Unlike a chat_card creative, the template needs no file_id or target_url because the selected feed item supplies its own image and destination URL, and an ad group can hold at most one non-archived product-ad template. For reporting, request the product segment from any insights endpoint to break performance down by product.item_id, which is how you verify what’s actually serving.
Campaign Targeting
Geo targeting supports country, region, and DMA. If you don’t provide location targeting at all the campaign can serve to all available locations, so US-only advertisers should treat this as a required step rather than an optional refinement.
Look up location IDs with the geo lookup endpoint, which returns an id, a type such as region or dma, a canonical_name, and a country_code:
curl -G "https://api.ads.openai.com/v1/geo_lookup/search" \
  -H "Authorization: Bearer $OPENAI_ADS_API_KEY" \
  --data-urlencode "q=San Francisco" \
  --data-urlencode "limit=5"
Pass the IDs at campaign creation under targeting.locations.include, where each entry only needs the id and the API expands the saved campaign with full location details:
{
  "targeting": {
    "locations": {
      "include": [
        { "id": "2000043" },
        { "id": "3000194" }
      ]
    }
  }
}
The docs also model a habit worth copying, which is creating campaigns with status: "paused" while you validate setup and flipping to active only once the campaign, ad groups, and ads are all ready.
Conversion-Optimized Campaigns
This is where the measurement work pays for itself. Conversion-optimized campaigns, or oCPC, optimize delivery toward one tracked conversion event while you continue paying per valid click.
| Goal | Best for | How you pay | Delivery optimizes for |
|---|---|---|---|
impressions (CPM) |
Reach and awareness | Per 1,000 impressions | Broad delivery at scale |
clicks (CPC) |
Engagement and traffic | Per valid click | Clicks from people likely to engage |
conversions (oCPC) |
A tracked post-click action | Per valid click, not per conversion | Clicks more likely to lead to your selected event |
Prerequisites
Your ad account must support conversion bidding. If campaign creation returns a 403 with Conversion bidding is not enabled, that’s a conversation with your OpenAI partner representative rather than a configuration you can fix yourself.
Conversion tracking must be in place through the pixel, the Conversions API, or both, and the docs again note the Conversions API as the more reliable source. You need exactly one active standard conversion event as the goal, custom events cannot serve as oCPC optimization goals, and the conversion event setting must belong to the current ad account and connect to one active conversion source. The quality of your tracking data feeds the optimization directly, which is why the server-side layer isn’t gold-plating.
Creating an oCPC Campaign
Campaign creation uses bidding_type: "conversions" along with a conversion event setting ID:
{
  "name": "Acme purchases",
  "status": "paused",
  "budget": {
    "lifetime_spend_limit_micros": 250000000
  },
  "bidding_type": "conversions",
  "conversion_event_setting_ids": ["ces_123"]
}
Child ad groups use billing_event_type: "click", and here’s the counterintuitive part: max_bid_micros is your CPA bid even though billing happens per click. A value of 100000000 means a $100.00 target cost-per-acquisition on a USD account. OpenAI uses that CPA bid alongside ad quality, relevance, click likelihood, and conversion likelihood to decide how aggressively to compete for clicks that are likely to convert. You’re still billed per valid click at whatever the auction determines, and the CPA bid is an optimization input rather than a conversion charge.
Immutability Rules
You can’t convert an existing CPM or CPC campaign to oCPC, and you can’t change the goal or the selected conversion event after creation. In both cases the answer is a new campaign.
Product-feed campaigns can’t use oCPC at all, so if you’re running catalog ads and conversion-optimized ads, those are two separate campaigns by design. When you evaluate performance, treat conversions as the primary outcome, calculate cost per conversion as spend divided by conversions, pick an event with enough volume for the system to learn from, and let it accumulate meaningful data before you start adjusting bids and budgets.
Rollout Sequence
If I’m sequencing this for a client, it breaks into three phases, and the first one is genuinely an afternoon of work.
Phase 1: Minimum Viable
Create a Pixel ID in the conversions tab of Ads Manager, install the base pixel snippet in the <head> site-wide with debug: true, and add measure calls for your two or three real conversion events with correct data types and integer amounts. Verify in the browser console and Network panel, then disable debug before you ship.
Phase 2: Fully Optimized
Provision a Conversions API key, then persist oppref from the __oppref cookie into your session or order data server-side. Mirror your high-value events through the Conversions API using shared event IDs for deduplication, add <noscript> image tags as a fallback on critical pages, and test everything with validate_only: true before going live.
Phase 3: Campaign Optimization
Confirm conversion events are flowing with real volume, create a conversion event setting for your primary standard event, then launch an oCPC campaign with bidding_type: "conversions" in a paused state. Build out ad groups with click billing and a realistic CPA bid, activate, and let it run. For ecommerce, stand up the product feed over SFTP, mark items is_ads_eligible, and run a separate product_feed campaign, remembering it can’t use oCPC.
Conclusion
The pixel alone gets you attributed conversions and satisfies the tracking prerequisite for conversion-optimized campaigns. That’s a real result for an afternoon of work, and it’s the right place to start on any account.
The synced pixel and Conversions API setup is what makes the channel measurable enough to scale. It recovers the conversions the browser would have dropped, deduplicates them cleanly against the client-side events, and preserves the oppref attribution signal end to end. Given that OpenAI’s own conversion-optimized delivery is only as good as the data you feed it, the server-side layer is the difference between running ads in ChatGPT and actually knowing what they’re worth.