Pardot is a wonderful marketing automation tool that can automate some of the tedious tasks of integrating a website with SalesForce. Integrating a website with Pardot is a multi-stage process that varies from organization to organization. From a high level perspective, every migration involves two primary integration methods: visitor tracking and data collection. This guide to Pardot & WordPress integration will provide you with the steps you need to successfully handle a website integration with ease.
![]() Tracking Visitor Activities
Tracking Visitor Activities
Pardot comes equipped with a full featured analytics tracking tool. From a technical standpoint, the analytics portion of Pardot is quite similar to Google Analytics. You install a tracking script on every page of your website and visitor behavior is tracked using a persistent cookie. Each cookie is associated with a Visitor record, there activities are tracked and stored under the Prospects > Visitors menu in Pardot.
To setup a WordPress site with Pardot visitor tracking install and activate the Pardot plugin, then:
- Go to Settings > Pardot Settings to put in your email, password, and user key.
- Select your campaign (for tracking code usage)
That’s it, your website is now tracking all visitor activity in Pardot. Next, let’s take a look at how to handle the data collection portion of the integration. To do this we’ll be using Pardot forms and Gravity Forms to send information into Pardot from a WordPress website.
Collecting Information
Pardot collects information submitted to a website, creating Prospect records.
If you’re planning to integrate Pardot + SalesForce with WordPress I highly suggest using Gravity Forms for advanced form creation. It’s easily the best form building tool available for WordPress, and with the right configuration it can send submitted data right into Pardot without the need for custom programming.
Step 1: Create a Gravity Form
The first step to integrating Pardot with WordPress is to install Gravity Forms and create a form. For the purposes of this example we’ll be working with a basic contact form. For more information on this I suggest checking out the Getting Started section of their documentation.
Step 2: Create a Pardot Form Handler
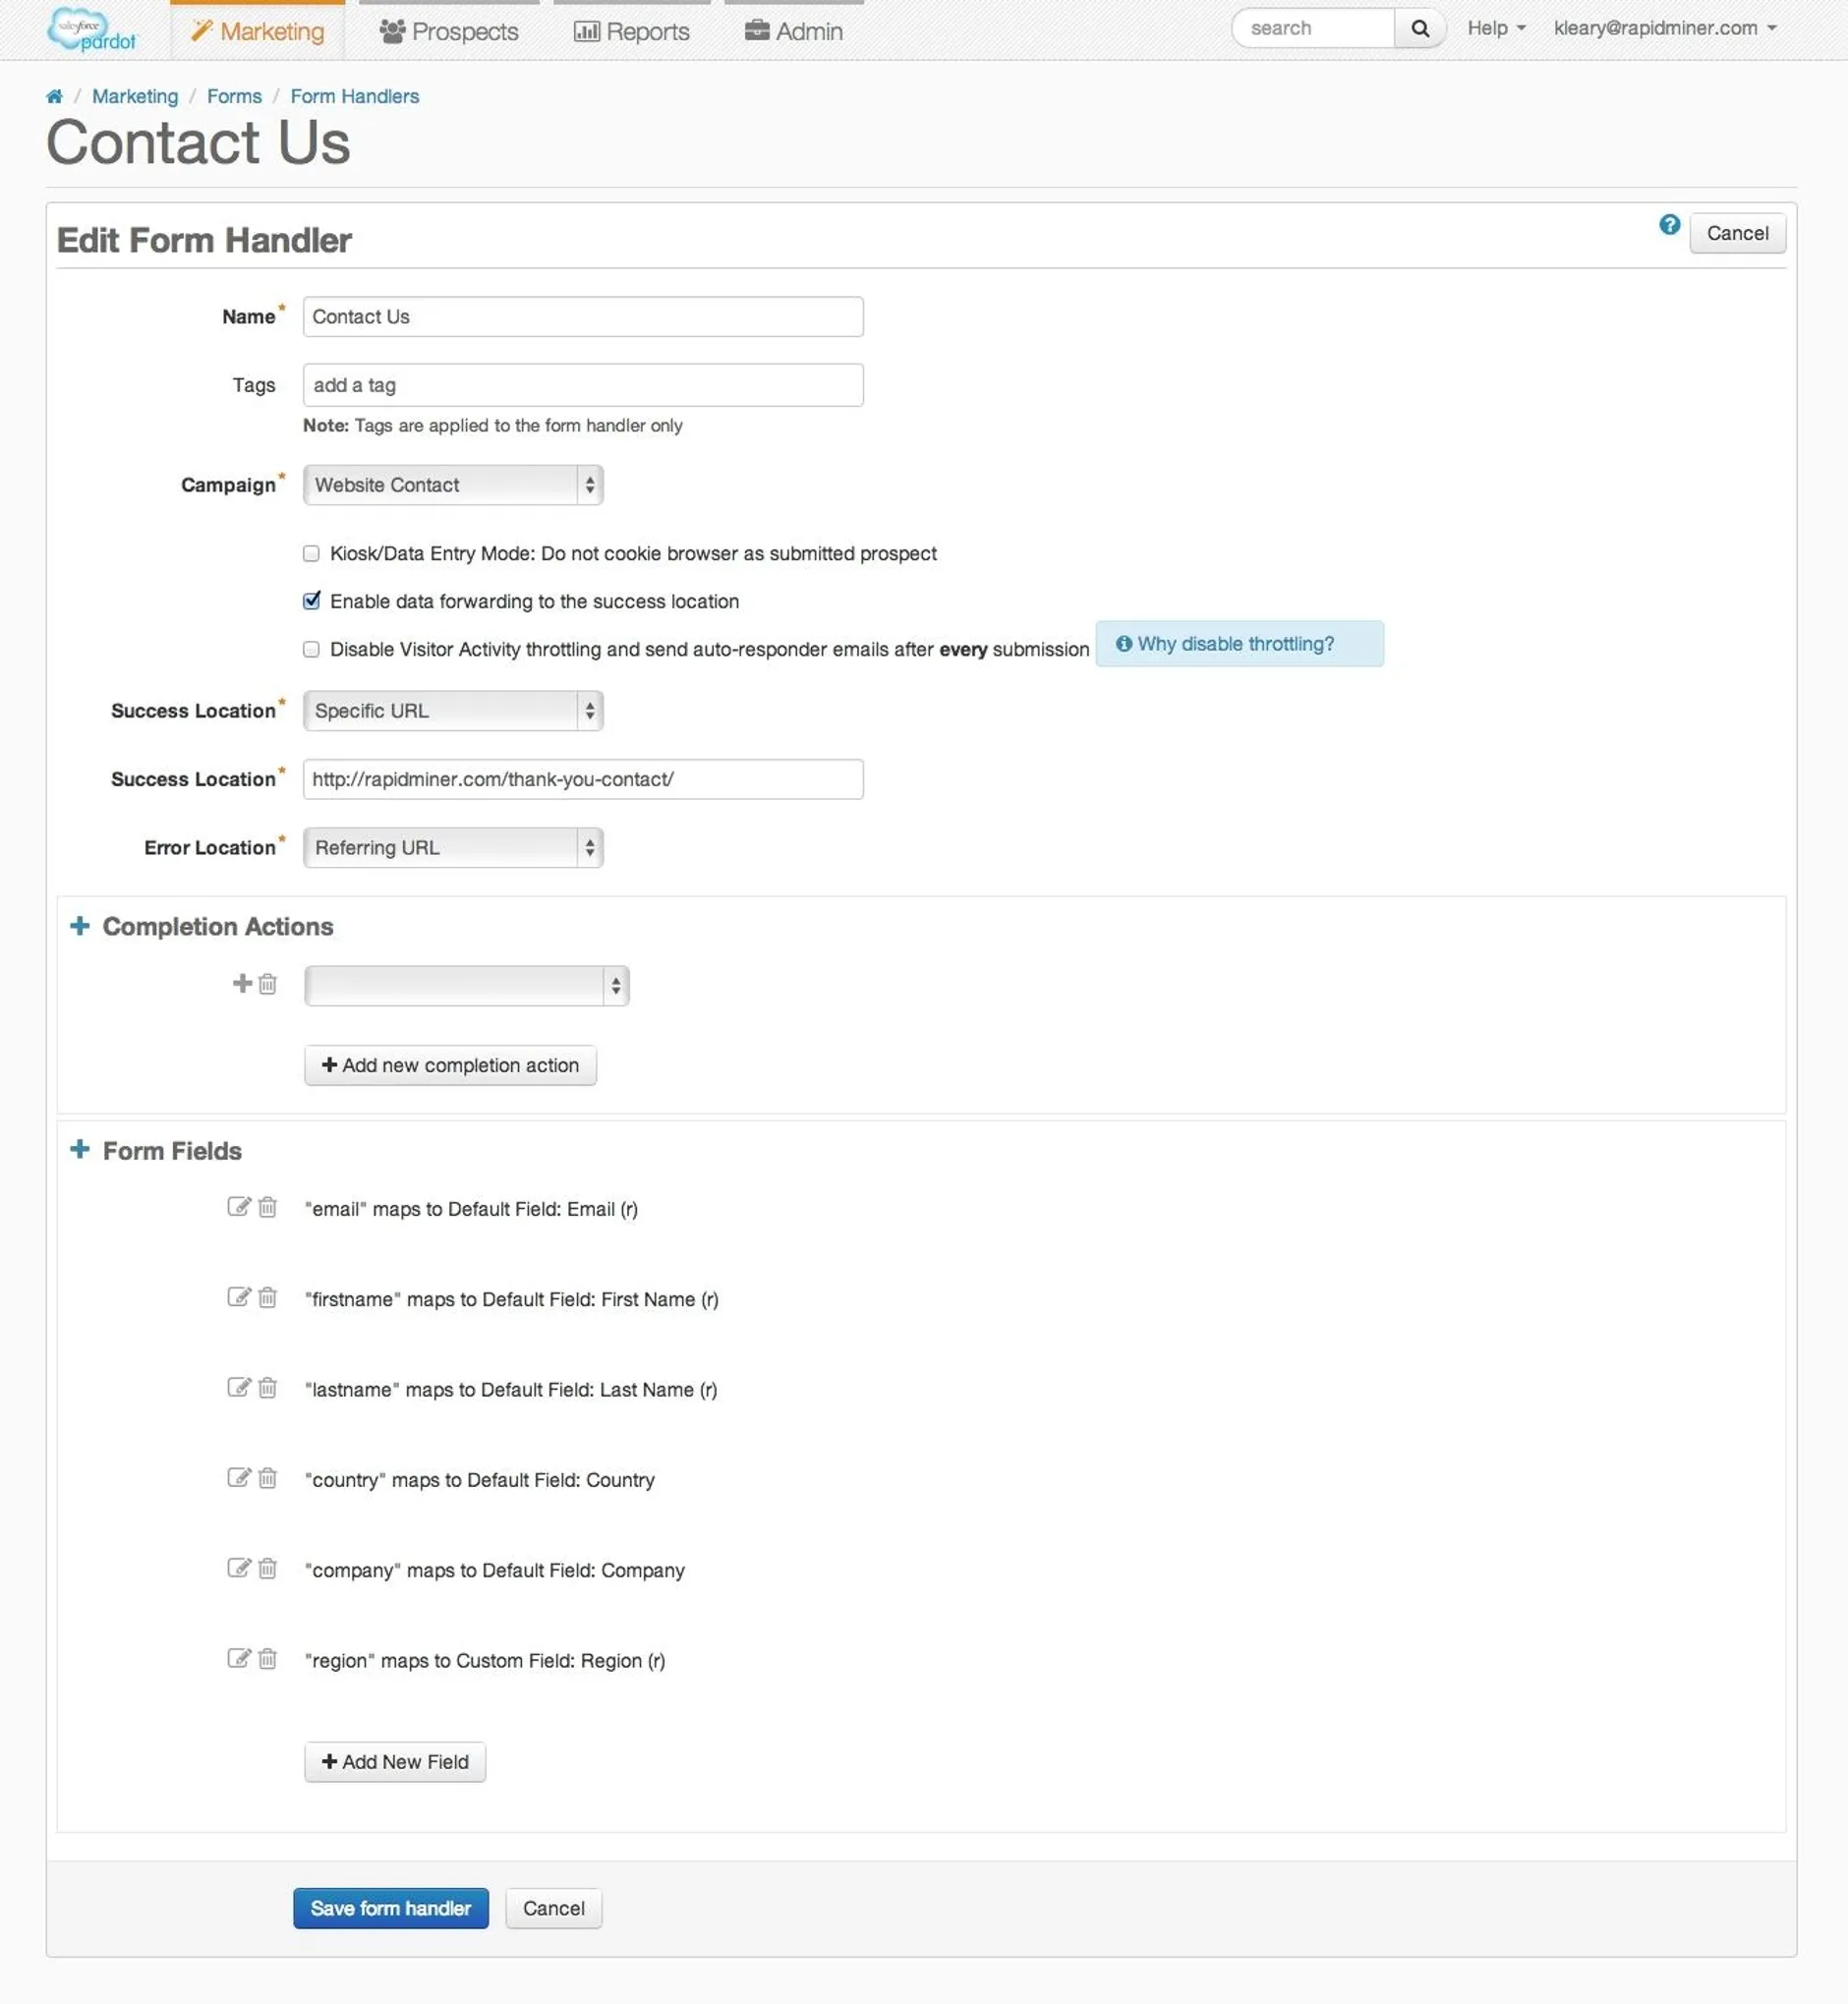
Once you have a gravity form configured and ready to go you’ll need to create a Form Handler in Pardot. In Pardot, form handlers give us the ability to create our own web forms that submit information to Pardot.
Let’s create our Pardot form handler for use with Gravity Forms:
- Create the form handler. On the Marketing > Forms > Form Handlers view in Pardot, click the Add Form Handler button.
- Give it a name. I’d suggest matching the name of your gravity form, but it’s up to you.
- Choose a tracking campaign. This is up to your and your marketing team to decide on.
- Uncheck ‘Kiosk/Data Entry Mode’. This ensure that visitor cookies are associated with the new prospect record that is created.
- Set success and error locations. This is also up to you, but I would suggest using the URL of a “Thank you” page in WordPress for tracking conversions.
- Map Gravity form fields to Pardot fields. This ensures that the fields submitted with your Gravity Form are correctly received and stored in Pardot. For this, don’t worry about using the
nameoridvalues of your form fields, just make each field logical and easy to remember. We’ll actually handle most of the real mapping within Gravity Forms. - Finish the process and make note of your form handler URL. Once you’ve successfully created the form handler make note of the URL field provided. This looks something like:
https://go.pardot.com/l/XXXXX/2014-04-03/cqty
That’s it, you’re all done with the setup inside of Pardot, the next step is to configure Gravity Forms properly.
 Step 3: Configure Gravity Forms
Now that we have a form handler setup in Pardot we need to post our Gravity Form submission data to it. To do this you’ll need to:
- Open up your Gravity Form
- Setup a confirmation redirect
- Select Redirect as your confirmation type
- Enter your form handler URL into the Redirect URL field
- Check the Pass Field Data Via Query String field
- Write a GET query to map your Gravity Form fields over to the logical, easy to remember names you created earlier. This will look something like:
firstname={Name (First):11.3}&lastname={Name (Last):11.6}&email={Email:3}&country={Country:8}&company={Organization:10}®ion={Region:7}
 Conclusion
That’s it, you’re all set. When you submit this Gravity Forms your data will be posted to Pardot, and Pardot will redirect back to your form handler’s success location.
Related Articles
Meet the Author